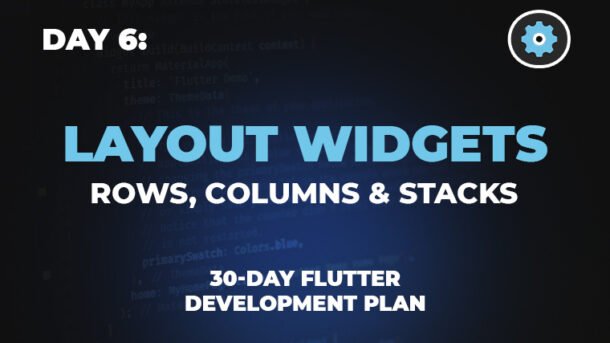
Welcome to Day 6 of our Flutter adventure! So far, you’ve learned why Flutter is awesome, grasped the basics of Dart, and understood that “everything is a Widget.” Today is where things get really exciting: we’re going to learn how to arrange those widgets on the screen to build your app’s visual layout!
Flutter Layout Playground
Explore how to arrange widgets with `Row`, `Column`, `Stack`, and more!
1. `Column`: Arranging Widgets Vertically
A `Column` widget arranges its children one below another. Use the controls below to see how you can position them along the main (vertical) and cross (horizontal) axes.
Column(
  mainAxisAlignment: MainAxisAlignment.center, // Controlled by Main Axis Alignment
  crossAxisAlignment: CrossAxisAlignment.start, // Controlled by Cross Axis Alignment
  children: <Widget>[
    Text('Item 1'),
    Text('Item 2'),
    Text('Item 3'),
  ],
)
2. `Row`: Arranging Widgets Horizontally
A `Row` widget arranges its children side-by-side. Experiment with the controls to see how you can position them along the main (horizontal) and cross (vertical) axes.
Row(
  mainAxisAlignment: MainAxisAlignment.center, // Controlled by Main Axis Alignment
  crossAxisAlignment: CrossAxisAlignment.center, // Controlled by Cross Axis Alignment
  children: <Widget>[
    Icon(Icons.thumb_up),
    Text('Like'),
    Icon(Icons.comment),
    Text('Comment'),
  ],
)
3. `Stack`: Layering Widgets
A `Stack` allows you to place widgets directly on top of each other. The first child is at the bottom, and subsequent children are layered on top. Use the buttons to change the position of the overlay item.
Stack(
  children: <Widget>[
    // This will be at the bottom
    Container(
      width: 200,
      height: 200,
      color: Colors.blue,
    ),
    // This will be on top of the blue container, positioned by Alignment
    Align( // Or Positioned widget for precise control
      alignment: Alignment.center, // Controlled by buttons
      child: Text(
        'Layered Text',
        style: TextStyle(color: Colors.white, fontSize: 24),
      ),
    ),
  ],
)
`Expanded` and `Flexible`: Giving Widgets Room
These widgets control how children fill available space within a `Row` or `Column`. `Expanded` forces its child to fill all remaining space, while `Flexible` allows it to fill space without forcing overflow.
Row(
  children: <Widget>[
    Container(width: 50, height: 50, color: Colors.purple),
    Expanded( // Currently Expanded
      child: Text('This text will expand to fill the row!'),
    ),
    Container(width: 50, height: 50, color: Colors.purple),
  ],
)
Think of it like arranging furniture in a room. You don’t just throw everything in; you put the sofa against one wall, the TV opposite it, and a lamp next to the armchair. In Flutter, we use special Layout Widgets to organize our other widgets.
The three most fundamental layout widgets are Row, Column, and Stack. Let’s dive in!
1. Column: Arranging Widgets Vertically (One Below Another)
Imagine you want to display a list of items, like a user’s profile picture, their name, and then their email, all neatly stacked one below the other. This is a perfect job for a Column widget.
A Column takes a list of children (other widgets) and arranges them vertically, from top to bottom.
Analogy: Think of a stack of books. Each book is a widget, and the Column is what holds them in a vertical pile.
Column(
  children: <Widget>[
    Text('Profile Picture'),
    Text('John Doe'),
    Text('john.doe@example.com'),
  ],
)
2. Row: Arranging Widgets Horizontally (Side-by-Side)
Now, what if you want to place items next to each other, like an icon followed by some text, or a button on the left and another on the right? For this, you use a Row widget.
A Row also takes a list of children and arranges them horizontally, from left to right.
Analogy: Imagine people standing in a line. Each person is a widget, and the Row keeps them standing side-by-side.
Row(
  children: <Widget>[
    Icon(Icons.star),
    Text('Rating: 4.5'),
  ],
)
MainAxisAlignment and CrossAxisAlignment: How to Position Widgets
Once you have a Row or Column, you’ll often want to control how its children are positioned within that row or column. This is where MainAxisAlignment and CrossAxisAlignment come in.
Every Row and Column has two axes:
- Main Axis:
- For a
Column, the main axis is vertical (top to bottom). - For a
Row, the main axis is horizontal (left to right). MainAxisAlignmentcontrols how children are placed along this main axis. Common values include:start: Place children at the beginning (top for Column, left for Row).end: Place children at the end (bottom for Column, right for Row).center: Center children along the axis.spaceBetween: Distribute space evenly between children.spaceAround: Distribute space evenly around children (including before the first and after the last).spaceEvenly: Distribute space evenly, including at the ends.
- For a
- Cross Axis:
- For a
Column, the cross axis is horizontal (left to right). - For a
Row, the cross axis is vertical (top to bottom). CrossAxisAlignmentcontrols how children are placed perpendicular to the main axis. Common values include:start: Place children at the beginning of the cross axis.end: Place children at the end of the cross axis.center: Center children along the cross axis.stretch: Make children fill the available space along the cross axis.
- For a
Example with Column:
Column(
  mainAxisAlignment: MainAxisAlignment.center, // Vertically center children
  crossAxisAlignment: CrossAxisAlignment.start, // Horizontally align children to the left
  children: <Widget>[
    Text('Hello'),
    Text('World!'),
  ],
)
Example with Row:
Row(
  mainAxisAlignment: MainAxisAlignment.spaceEvenly, // Horizontally distribute children evenly
  crossAxisAlignment: CrossAxisAlignment.center,    // Vertically center children
  children: <Widget>[
    Icon(Icons.thumb_up),
    Text('Like'),
    Icon(Icons.comment),
    Text('Comment'),
  ],
)
3. Stack: Layering Widgets (One on Top of Another)
Sometimes, you need to place widgets directly on top of each other, like putting text over an image, or a badge icon on a profile picture. This is where the Stack widget comes in.
A Stack allows you to layer multiple children widgets on top of each other, like a stack of papers. The first child in the list is at the bottom of the stack, and the last child is at the top.
Analogy: Think of transparent sheets of paper. You draw something on each sheet and then stack them up. Everything drawn on the top sheet is visible, and you can see through it to the sheets below.
Stack(
  children: <Widget>[
    // This will be at the bottom
    Container(
      width: 200,
      height: 200,
      color: Colors.blue,
    ),
    // This will be on top of the blue container, centered
    Center(
      child: Text(
        'Layered Text',
        style: TextStyle(color: Colors.white, fontSize: 24),
      ),
    ),
  ],
)
Expanded and Flexible: Giving Widgets Room to Grow (or Shrink)
What happens if you put a Text widget in a Row and it’s too long? Or if you want one part of your Row to take up more space than others? That’s where Expanded and Flexible are useful.
These widgets are used as children inside Row or Column to control how much space their child takes up along the main axis.
Expanded:- Forces its child to fill all available space along the
Row‘s orColumn‘s main axis. - If multiple
Expandedwidgets are present, they share the available space. You can give them aflexproperty (e.g.,flex: 2) to make one take twice as much space as another.
Row( children: <Widget>[ Container(width: 50, height: 50, color: Colors.red), Expanded( // This text will take up all remaining space child: Text('This text is very long and will expand to fill the row!'), ), Container(width: 50, height: 50, color: Colors.blue), ], )- Forces its child to fill all available space along the
Flexible:- Allows its child to fill available space, but it’s “flexible” and won’t force its child to take up all the space if the child doesn’t need it.
- Useful when you want a widget to expand if there’s room, but also shrink if there isn’t enough space, without causing overflow.
Row( children: <Widget>[ Container(width: 100, height: 50, color: Colors.red), Flexible( // This text will take available space, but won't force overflow child: Text('This text is flexible and will wrap or shrink if needed.'), ), Container(width: 100, height: 50, color: Colors.green), ], )
Conclusion
Today, you’ve unlocked the power of Flutter’s layout system! You now understand how to use Row to arrange widgets horizontally, Column for vertical arrangements, and Stack for layering. You’ve also learned how MainAxisAlignment, CrossAxisAlignment, Expanded, and Flexible give you precise control over how your widgets are positioned.
These layout widgets are the backbone of every Flutter UI. Practice combining them, and you’ll soon be building complex and beautiful screens with ease.
Tomorrow, on Day 7, we’ll explore User Interaction – how to add buttons, handle taps, and get input from users to make your apps truly dynamic!